How Do You Use a Spring Machine Effectively?
Feeling overwhelmed by the complexity of spring machines? Worried that mistakes in operation could lead to wasted material or downtime? Let me walk you through the essentials of how these machines work and how you can operate them efficiently.
Using a spring machine effectively involves understanding its core components, correctly setting up the wire and tooling, accurately programming the spring specifications via the controller, running test cycles, and carefully monitoring automatic production. Always prioritize safety protocols, like knowing how and when to use the emergency stop[^1], [^4].
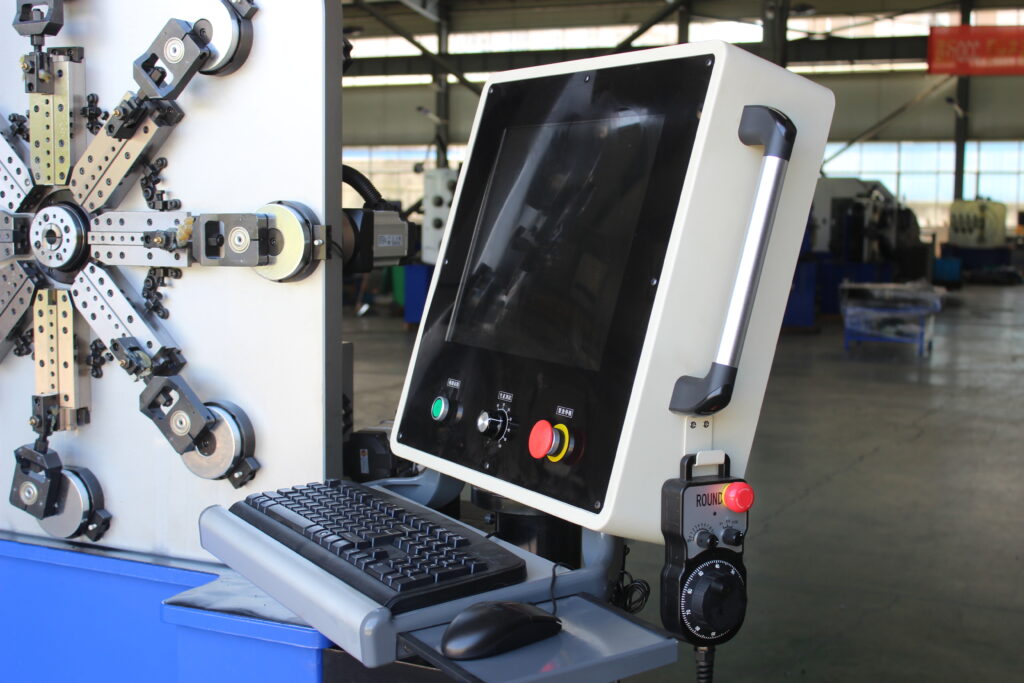
Now that you have a basic overview, you might be wondering about the mechanics behind it all. Let’s dive deeper into how these fascinating machines turn simple wire into essential components and how you can master their operation for consistent, high-quality results.
How Does a Spring Machine Actually Work?
Ever watched a spring machine rapidly churning out perfect springs and wondered about the magic inside? Curious how a straight piece of wire transforms so quickly? It’s not magic, but rather a symphony of precision-engineered mechanical movements controlled by sophisticated electronics.
A spring machine works by precisely feeding wire from a spool, using a system of computer-controlled servo motors and axes[^1] to guide the wire through specialized forming tools[^3] that bend and shape it, and finally employing a cutting mechanism to separate the finished spring.
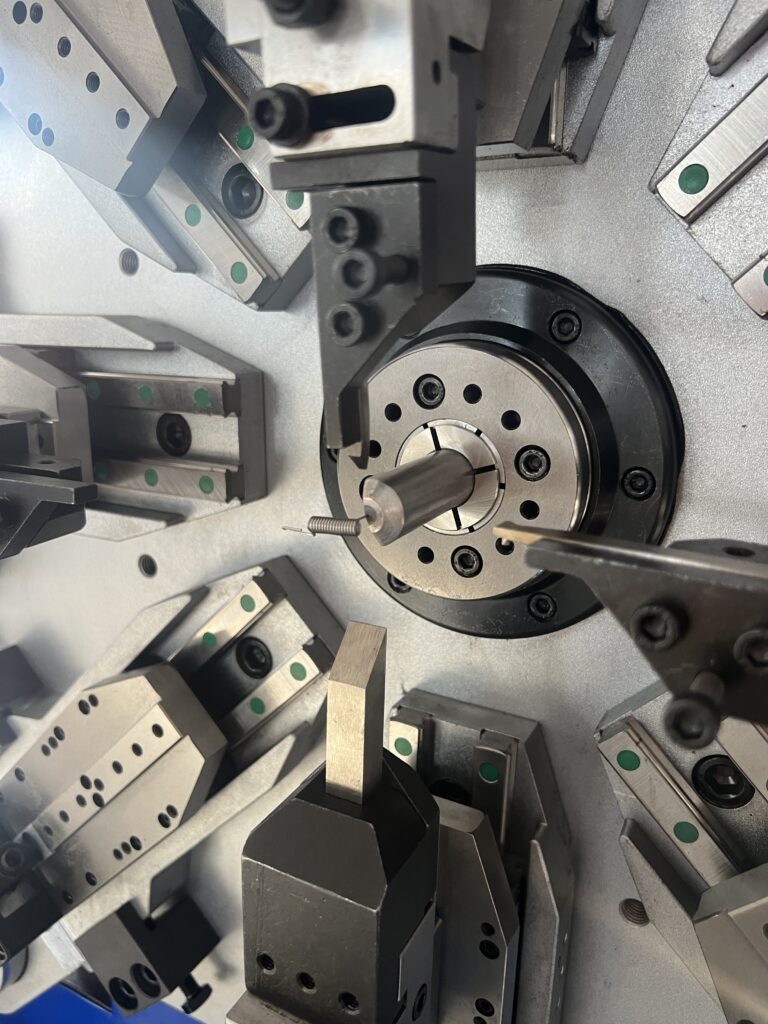
Let’s break down that process further. Understanding the interaction between the different parts helps immensely when you’re operating or troubleshooting the machine.
The Core Process: From Wire to Spring
At its heart, a spring machine automates the process of bending and cutting wire. Modern machines, especially CNC (Computer Numerical Control) types, execute a pre-programmed set of instructions with incredible accuracy and speed. The journey begins the moment wire is pulled from a decoiler or spool.
Key Components and Their Roles
Several critical systems work in concert:
- Wire Feed System: This usually consists of rollers driven by a dedicated servo motor. Its job is to push the wire into the working area of the machine at a precisely controlled speed and length. Consistent feeding is paramount for uniform springs. Any slip or inaccuracy here directly impacts the final product. I’ve seen issues where improper feed roller pressure caused inconsistent spring lengths, a real headache during quality control.
- Servo Motors & Axes: These are the muscles and nerves of the machine. Each axis (controlled by its own servo motor) is responsible for a specific type of movement – feeding the wire, bending it up or down, coiling it, rotating the forming head, or activating the cutter[^1], [^4], [^6]. The machine’s controller sends precise electrical signals to these motors, telling them exactly how far and how fast to move, often based on encoder feedback for closed-loop control. The number of axes dictates the machine’s capability; simple coilers might have 2-3 axes, while complex multi-axis forming machines can have 10, 12, or even more[^1], [^2], allowing for intricate 3D shapes.
- Forming Tools (Tooling): These are the custom-shaped pieces of hardened steel (like pins, guides, quills, arbors, and cutters) that physically contact the wire to bend it into the desired shape[^3]. Think of them as the machine’s fingertips. Setting up the correct tooling for a specific spring design is a critical skill for the operator. The tooling configuration directly translates the controller’s commands into physical bends and cuts.
- Cutting Mechanism: Once the spring is formed, a cutting tool, usually activated by its own axis, slices the wire to free the completed spring. The sharpness and alignment of the cutter are vital for a clean cut without burrs.
- Controller (The Brain): This is typically a dedicated industrial computer with a screen and keypad/touchscreen interface[^4]. Here, the operator inputs the spring program (defining dimensions, angles, number of coils, etc.), monitors the machine’s status, adjusts parameters, and troubleshoots issues using diagnostic screens[^2]. It interprets the program code and orchestrates the precise timing and movement of all the axes.
How a Spring is Formed: A Choreographed Dance
Imagine the controller as a conductor leading an orchestra. It reads the musical score (the spring program) and cues each instrument (each servo axis) at the perfect moment.
- Feed: The controller signals the feed axis to push a specific length of wire forward[^1].
- Bend/Coil: It then signals one or more forming axes to move the tooling, bending the wire against a point or quill, or pushing it to create curves or coils[^6]. Multiple axes might move simultaneously for complex shapes.
- Cut: Finally, the controller activates the cutting axis to shear the wire[^6].
- Repeat: The cycle instantly repeats for the next spring, often taking only fractions of a second.
Example: Forming a Simple Compression Spring
| Step | Action | Key Components Involved | Control Signal From |
|---|---|---|---|
| 1: Initialize | Machine powers up, axes return to zero[^1] | Controller, All Servo Motors/Axes | Operator / Startup Sequence |
| 2: Feed Wire | Push specific length of wire forward | Feed Rollers, Feed Servo Motor | Controller (based on program pitch) |
| 3: Form Coil | Bend wire around arbor/quill | Coiling Point Tools, Diameter Axes | Controller (based on program diameter) |
| 4: Add Pitch | Push wire forward while coiling | Feed Axis, Pitch Axis | Controller (based on program pitch) |
| 5: Repeat 2-4 | Continue feeding/coiling for required coils | Feed, Diameter, Pitch Axes | Controller (looping through program) |
| 6: Cut Off | Activate cutter to separate spring | Cutter Tool, Cutter Servo Motor | Controller (end of program sequence) |
| 7: Reset | Axes return to start position for next cycle | All relevant Servo Motors/Axes | Controller (program cycle restart) |
This coordinated action, repeated rapidly, allows for the efficient mass production of springs that meet tight tolerances.
What Does a Spring Maker Actually Do?
Think operating a sophisticated CNC spring machine is just about loading wire and pushing the ‘Start’ button? Think again. While automation handles the repetitive tasks, the skill and diligence of the spring maker or operator are crucial. They are the crucial link ensuring the machine translates a design into thousands of perfect springs.
A spring maker (or machine operator) is responsible for the entire process: interpreting specifications, setting up the machine with the correct wire and tooling, programming or loading the spring parameters[^1], [^4], running test pieces, monitoring the production run for quality and consistency, and performing necessary troubleshooting and maintenance.
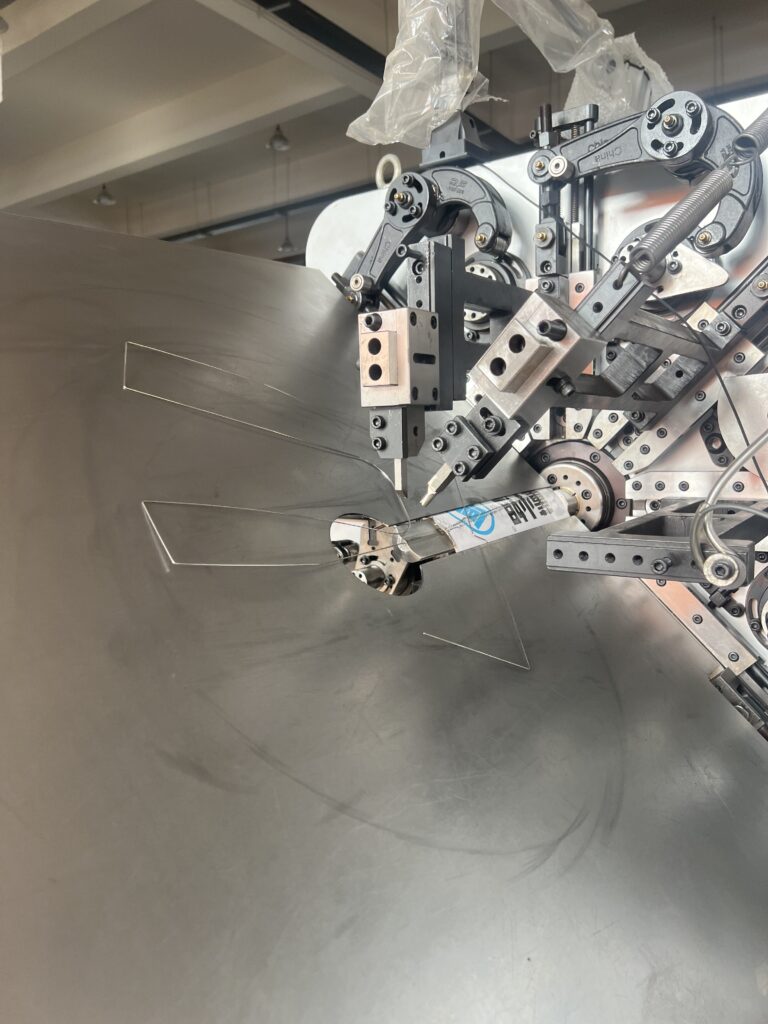
Let’s delve into the day-to-day responsibilities and skills that define this vital role in manufacturing.
From Blueprint to Physical Product
The operator’s job starts long before the machine runs automatically. They need to understand the requirements of the spring they need to produce, often working from technical drawings or specification sheets.
Key Responsibilities Breakdown
Here’s a closer look at the tasks involved:
- Interpretation & Planning: Reading and understanding spring blueprints or specification sheets. This includes dimensions like wire diameter, coil diameter, free length, number of coils, pitch, end types, and required tolerances. Planning the production run, including material requirements.
- Machine Setup & Calibration:
- Material: Selecting the correct wire type (music wire, stainless steel, etc.) and diameter, loading the spool onto the decoiler, and feeding the wire correctly through the machine’s guides and feed rollers. Adjusting feed roller pressure is often key.
- Tooling: Choosing and installing the appropriate forming tools (quill, coiling points, pitch tool, cutter, etc.) for the specific spring design. This often requires precision and careful alignment. I remember spending hours getting the tooling just right for a complex torsion spring – patience is key!
- Calibration: Performing the machine’s homing or zero-return procedure[^1] to ensure all axes start from a known, accurate reference point. This is essential after powering up or clearing certain errors.
- Programming:
- Entering the spring parameters into the CNC controller. This might involve:
- Loading a pre-existing program number and verifying/adjusting it[^1], [^4].
- Creating a new program by inputting data step-by-step for each axis movement (length, angle, radius, etc.) using the machine’s interface[^1]. This requires understanding the machine’s specific programming language or graphical interface.
- Saving new or modified programs for future use[^4].
- Entering the spring parameters into the CNC controller. This might involve:
- Operation and Monitoring:
- Running initial test springs, often at a reduced speed[^6], to verify the setup and program.
- Measuring test springs carefully using calipers, micrometers, load testers, and vision systems.
- Making fine adjustments to program parameters or tooling positions to bring the springs within specification. This iterative process requires patience and precision.
- Once satisfied, switching the machine to automatic mode and starting the production run[^6].
- Continuously monitoring the machine’s operation (listening for unusual noises, watching for wire feed issues) and periodically checking the dimensions and quality of the springs being produced.
- Troubleshooting:
- Quickly identifying and resolving common production issues like wire jams, inconsistent feeding, tool wear or breakage, dimensional drift, or program errors.
- Understanding error messages on the controller’s diagnostic screen[^2] and knowing the appropriate corrective actions.
- Knowing when and how to use the emergency stop button safely in case of immediate danger or potential machine damage[^2], [^4]. Resetting the machine after an emergency stop often requires specific procedures[^1].
- Quality Control: Performing regular quality checks according to company standards or customer requirements. Documenting results and making adjustments as needed. Segregating any non-conforming parts.
- Maintenance: Performing routine operator maintenance, such as cleaning the machine, lubricating moving parts, checking fluid levels, and reporting any potential issues requiring specialized maintenance personnel.
Essential Skills for a Spring Maker
| Skill | Importance | Example Tasks | Related References |
|---|---|---|---|
| Technical Aptitude | High | Understanding machine mechanics, setting up tooling, aligning components | [^3] |
| Reading Blueprints | High | Interpreting dimensions, tolerances, material specs from drawings | |
| CNC Programming | Medium-High | Entering/editing spring parameters, understanding machine code/interface | [^1], [^4] |
| Attention to Detail | Very High | Precise setup, monitoring output variation, meticulous quality checks | [^6] |
| Measurement & Testing | High | Using calipers, micrometers, load testers accurately | |
| Problem-Solving | High | Diagnosing production errors, adjusting parameters, basic troubleshooting | [^2] |
| Safety Awareness | Very High | Following lockout/tagout, proper use of guards, emergency procedures | [^1], [^2], [^4] |
| Basic Maintenance | Medium | Cleaning, lubrication, recognizing signs of wear |
Becoming a proficient spring maker takes a combination of technical knowledge, hands-on skill, and consistent attention to detail. It’s a challenging but rewarding role at the heart of manufacturing.
Why Are Spring Making Machines So Important?
Ever stop to think about how the countless springs inside everyday objects, from your pen to your car, actually get made? Trying to make them by hand consistently and quickly would be impossible. That’s where spring making machines become indispensable heroes of modern manufacturing.
Spring making machines are vital because they enable the rapid, precise, and consistent mass production of springs[^2], which are essential functional components across nearly every industry, including automotive, aerospace, electronics, medical devices, and consumer goods[^5].
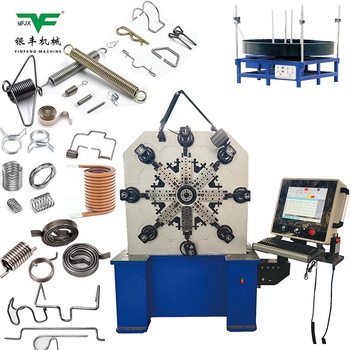
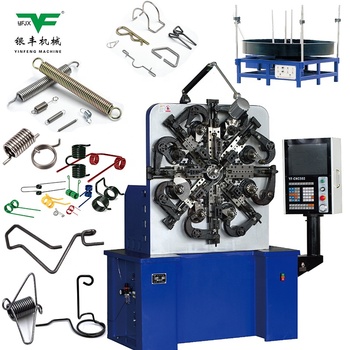
Their importance goes far beyond just making springs; they are fundamental enablers of technological advancement and efficient industrial production. Let’s explore why they hold such a critical position.
The Backbone of High-Volume, High-Quality Spring Production
Before automated machines, spring making was a laborious, manual process prone to inconsistency. Modern spring machines revolutionized this.
Key Advantages Driving Industrial Reliance
The widespread adoption of spring making machines stems from several compelling advantages:
- Unmatched Speed and Efficiency: Automated machines can produce springs at incredible speeds, sometimes multiple springs per second. This high throughput is essential for meeting the demands of mass production lines, drastically reducing the time required compared to manual methods. This speed directly translates to lower production costs per unit.
- Exceptional Precision and Consistency: CNC controllers execute programmed instructions with microscopic accuracy, ensuring that every spring produced meets tight dimensional tolerances[^2]. This repeatability is critical in applications where performance and safety are paramount, such as automotive valve springs or medical device components. Manual methods simply cannot achieve this level of consistency across large batches.
- Ability to Handle Complexity: Modern multi-axis CNC machines can create highly complex spring geometries, including various end hooks, loops, bends, and non-linear coil patterns[^2], [^5]. They can manipulate wire in three dimensions to produce torsion springs, tension springs, wire forms, and other intricate shapes that would be extremely difficult, if not impossible, to manufacture consistently by hand or with simpler machinery. I’ve worked on machines producing tiny, complex springs for electronics that always amazed me.
- Reduced Material Waste: Optimized programming and precise control over wire feeding minimize scrap material compared to less accurate methods. This not only saves costs but also contributes to more sustainable manufacturing practices.
- Automation and Labor Savings: While requiring skilled operators for setup and monitoring[^1], [^4], the automation of the repetitive forming process significantly reduces the amount of direct manual labor needed per spring. This allows skilled workers to focus on higher-value tasks like quality control, programming, and maintenance.
- Versatility and Customization: A single CNC machine can often be reprogrammed to produce a wide variety of different springs within its size range, offering production flexibility[^4]. Furthermore, specialized machines can be designed and built for niche applications, such as producing specific types like zig-zag springs for furniture or tiny torsion springs for hair clips[^3], showcasing the adaptability of the technology.
- Enhanced Safety: Enclosed work areas and automated processes reduce operator exposure to moving parts compared to manual bending, although adherence to safety protocols remains crucial[^2].
Enabling Key Industries and Technologies
The impact of spring machines resonates across numerous sectors:
| Industry | Example Spring Applications | Why Machine Production is Crucial | Relevant References |
|---|---|---|---|
| Automotive | Suspension coils, valve springs, clutch springs, seat mechanisms | High volume, extreme reliability, tight tolerances, safety-critical | [^5] |
| Electronics | Battery contacts, switch mechanisms, connector pins, heat sinks | Miniaturization, high precision, massive volumes, conductivity | [^5] |
| Aerospace | Landing gear, flight control actuators, valve regulators | Extreme reliability, performance under stress, exotic materials | [^5] |
| Medical Devices | Catheters, guidewires, surgical instruments, drug delivery pens | Biocompatibility, ultra-high precision, miniaturization, cleanliness | |
| Consumer Goods | Pens, toys, appliances, furniture (e.g., zig-zag springs[^3]) | Cost-effectiveness, high volume, diverse shapes and sizes | [^3], [^5] |
| Industrial Equipment | Valves, pumps, machine tools, safety relief devices | Reliability, durability, specific load requirements |
In essence, spring making machines are fundamental building blocks of the modern industrial world. Their ability to produce essential components quickly, accurately, and cost-effectively underpins the functionality and feasibility of countless products and technologies we rely on every day. Without them, manufacturing as we know it would simply not be possible.
How Do You Operate an Automatic Spring Making Machine?
Ready to take the controls of an automatic spring making machine? Feeling a bit intimidated by the array of buttons and screens? Don’t worry, while each machine has its specifics, following a logical operational flow makes the process manageable and safe.
To operate an automatic spring machine, you typically follow these steps: power on safely, perform a zero-return (homing) for all axes[^1], load or create the correct spring program[^4], ensure wire and tooling are correctly set up, run a test cycle to verify[^6], make necessary adjustments, and then initiate and monitor the automatic production mode[^6].
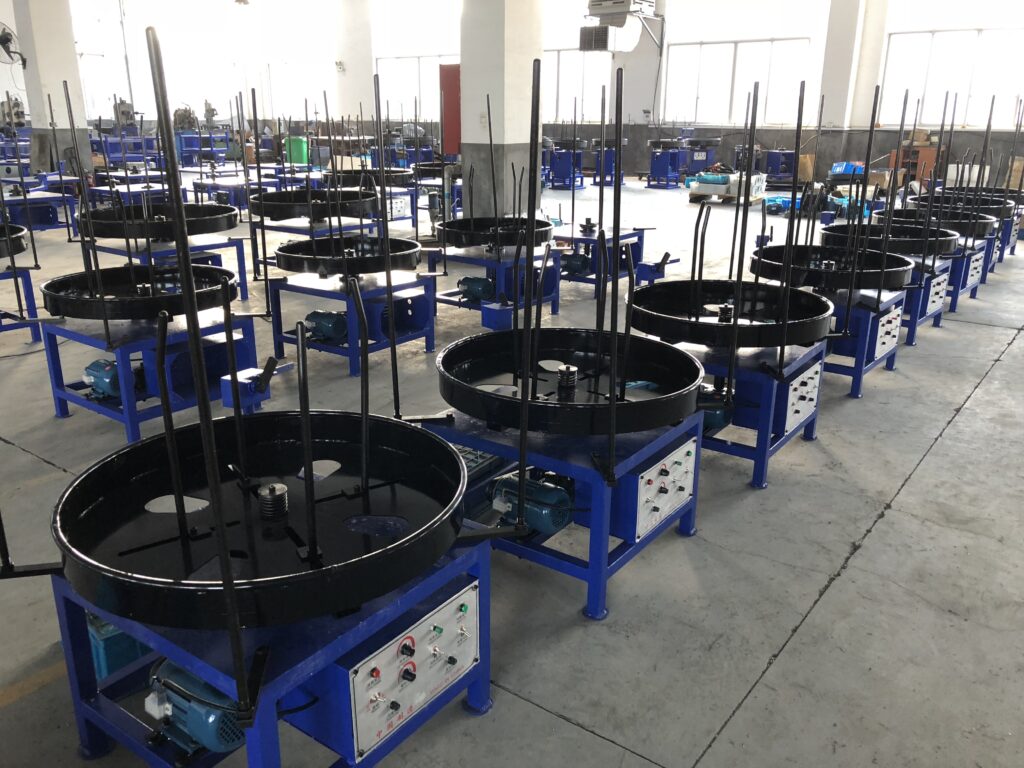
Let’s walk through these steps in more detail, drawing on common procedures found in machine manuals, to give you a solid foundation for operating these powerful tools.
A Step-by-Step Guide to Basic Operation
Operating an automatic (usually CNC) spring making machine requires methodical steps to ensure safety, accuracy, and efficiency. While control panels and software interfaces differ between manufacturers and models (like the Topcon systems mentioned in some manuals[^1], [^2], [^4], [^6]), the core principles and workflow remain consistent.
The Typical Operational Flow
Here’s a breakdown of the sequence you’ll generally follow:
-
Power On & Initial Safety Checks:
- Pre-Check: Before applying power, visually inspect the machine for any obvious issues. Ensure safety guards are in place. It’s often recommended to press the Emergency Stop button before powering on to minimize electrical surges, then release it after power is stable[^1], [^2].
- Power Up: Turn on the main electrical disconnect, then power on the machine controller.
- System Boot & Alarms: Wait for the control system to boot up. Check the screen for any active alarms or error messages. Clear any routine alarms (like needing homing) according to the manual’s instructions.
-
Homing (Zero Return):
- Purpose: This critical step establishes the machine’s exact starting position for all moving axes. Without homing, the controller doesn’t know where the tools are, leading to inaccurate movements.
- Procedure: Navigate the controller menu to the ‘Zero Return’ or ‘Homing’ function[^1]. Select the option to home all axes (or sometimes individual axes if needed). The machine will move each axis slowly until it contacts a limit switch or encoder marker, setting its zero position.
- Verification: Confirm that the screen indicates all axes are successfully homed and that they appear to be in their correct starting positions[^1].
-
Load Program & Prepare Materials/Tooling:
- Program Selection: Access the program directory or list. Select the program number corresponding to the spring you intend to produce[^1], [^4]. Ensure it’s the correct version. If you need to create a new program, enter the program editing mode and input the parameters line by line, defining each movement[^1]. Remember to save your program[^4].
- Wire Setup: Verify the correct wire material and diameter is loaded onto the decoiler. Carefully thread the wire through the straighteners, feed rollers, and guides, ensuring it reaches the forming area without kinks. Adjust feed roller pressure appropriately – too loose and it slips, too tight and it deforms the wire.
- Tooling Check: Double-check that all necessary forming tools (quill, coiling points, pitch tool, cutter, etc.) for the loaded program are correctly installed, securely fastened, and not visibly worn or damaged[^3]. Tooling setup is often the most time-consuming part of a changeover.
-
Manual Adjustments (If Necessary):
- Manual Mode: Switch the controller to Manual Mode (often labeled ‘MPG’, ‘Handwheel’, ‘Jog’, or simply ‘Manual’)[^1], [^4], [^6].
- Fine-Tuning: Select the specific axis you want to move. Use the handwheel (MPG) or jog buttons to make small, precise adjustments to tool positions relative to the wire, if required by the setup sheet or observations. Be cautious during manual movements.
-
Test Run & Verification:
- Test Mode: Switch to a ‘Test’, ‘Single Cycle’, or ‘Step’ mode. This allows you to run the program one spring at a time or step-by-step, often at a reduced speed controlled by a knob or setting[^6].
- Observe & Measure: Carefully watch the machine execute the program for the first spring. Check for smooth movements, proper forming, and clean cutting. Measure the resulting spring meticulously against the specifications using calipers, gauges, load testers, etc.
- Adjust & Repeat: If the spring is out of tolerance, go back to the program editing mode, adjust the relevant parameters (e.g., feed lengths, angles), save the changes[^4], and run another test spring. This iterative "adjust-test-measure" cycle[^6] continues until the spring consistently meets all requirements. This is where operator skill really shines.
-
Automatic Production Run:
- Select Auto Mode: Switch the controller to ‘Automatic’ or ‘Continuous’ mode[^6].
- Set Speed: Adjust the production speed override to the desired rate, balancing speed with quality and machine stability. Often, you start slower and gradually increase.
- Start Production: Press the ‘Cycle Start’ or ‘Auto Start’ button[^6]. The machine will now continuously produce springs according to the loaded program.
-
Monitor Production & Stop Procedures:
- Vigilance: Don’t just walk away! Continuously monitor the machine’s operation. Listen for any changes in sound, watch the wire feed, and periodically take samples for quality checks throughout the run. Factors like wire tension changes or tool wear can cause dimensions to drift over time.
- Normal Stop: To pause or end the production run normally (e.g., end of shift, material runs out), use the ‘Stop’ or ‘Cycle Stop’ button. This usually allows the machine to finish the current spring before stopping[^6].
- Emergency Stop (ESP): Use the red Emergency Stop button only for actual emergencies – danger to personnel, imminent machine crash, major malfunction[^2], [^4]. Pressing it cuts power to motors immediately and halts all motion abruptly. Remember that after an ESP, you will likely need to clear the fault, re-home the machine[^1], and potentially reset your production count.
Key Control Functions Summary
| Control Type | Typical Function | Common Labels | Reference |
|---|---|---|---|
| Emergency Stop | Immediate halt of all machine motion and outputs | ESP, E-Stop | [^1], [^2], [^4] |
| Power Control | Main power disconnect, Controller On/Off | Power, On, Off | [^1] |
| Mode Selector | Choose between Auto, Manual, Edit, Home, Test modes | Mode, Auto, Man, Edit | [^4], [^6] |
| Program Management | Load, Save, Edit, Create programs | Prog, P/N, Edit | [^1], [^4] |
| Manual Axis Control | Select axis, move with Handwheel/MPG or Jog buttons | MPG, Hand, Jog | [^1], [^4], [^6] |
| Cycle Start/Stop | Begin/End automatic production run | Start, Stop, Cycle | [^6] |
| Speed Override | Adjust production speed during Auto mode | Speed, %, Override | [^6] |
| Navigation/Input | Keypad, Touchscreen for menu navigation, data entry | Arrows, Enter, Esc | [^1], [^4] |
| Diagnostic/Info | Access system status, alarms, I/O monitoring | Diag, Info, Alarm | [^2] |
Always, always consult the specific operation manual provided by the manufacturer for your particular spring machine model. Safety procedures and control specifics can vary. Consistent, safe operation comes from understanding the machine, following procedures, and paying close attention.

Conclusion
Mastering a spring machine comes down to understanding its mechanics, knowing the operational steps from setup to production, and always prioritizing safety[^1], [^2], [^4]. Follow the procedures, pay attention to detail, and you’ll produce high-quality springs efficiently.
My Role
As your ghostwriter, I reflect your expertise and experience in the spring machinery industry. I aim to produce content that is informative, practical, and resonates with professionals seeking to understand or improve their use of this technology, using a clear and accessible tone.
My Target Audiences:
This post is aimed at machine operators, manufacturing engineers, production managers, and anyone new to the spring manufacturing industry who needs a practical understanding of how spring machines work and how to operate them effectively and safely.
[^1]: Based on procedures described in Topcon 10-12 axis camless spring machine manual sections on power on, zero return, program loading, and manual operation.
[^2]: Information derived from Topcon 10-12 axis camless spring machine manual regarding emergency stop functions, diagnostics, and safety considerations.
[^3]: Functionality related to tooling as described in customized machine examples like grinding, torsion forming, and zig-zag machines.
[^4]: Operational details from the TOPCON CNC coiling machine 6 axis manual, covering emergency stop, axis selection, program opening/saving, and manual pulse generator (MPG) use.
[^5]: General information about spring machines, their types (coiling, bending), and their role in various industries as suggested by blog post titles and industry applications mentioned on product pages.
[^6]: Insights from the Topcon 10-12 axis camless spring machine manual on automatic mode selection, test run procedures, speed control, start/stop functions, and manual key usage.
